12 Steps to Prevent Mold Build Up

It’s not always convenient or necessary to call the big guns (i.e. Us) in to handle your mold situation. This is especially true, if you haven’t had any recent major water damage or recently had a problem solved by us.
While we recommend calling in professionals to handle any major mold issues, there are a few simple steps that you-the homeowner- can take to stop mold it its tracks…or at least hold it at bay.
Here are twelve simple steps to prevent mold growth.
Table of Contents
Step #1 Never Leave Standing Water alone
This is probably very obvious to the more mold-conscious of us, however, there are some people who still allow standing water to remain for long periods of time. Mold grows very quickly; some molds can see significant growth in as little as 24 hours.
If you need proof, smell your wet laundry the next time you’ve left it out for a few hours without drying.
I know…gross, but we’ve all had rough weeks.
Back to the point. If you detect a faintly musty odor on your clothing, mold has already begun to grow in due to the moisture left behind.
Step #2 Regulate Your Humidity
This step may be arguably new to most of you since we rarely consider our humidity levels.
Humidity becomes a problem mostly during the summer and spring. The EPA recommends, maintaining humidity between 30 and 60% to prevent mold growth. Using a humidity meter, you can measure the humidity levels in your home. If they are above 55%, you may want to consider buying a dehumidifier or air conditioner to help maintain safe levels.
Step #3 Ventilate Your Homes
Mold THRIVES in homes that have poor ventilation.
This happens for two reasons. First, mold spores are transported by drafts and breezes, meaning they exist pretty much everywhere. Not having good ventilation means that mold spores brought in on the breeze, have more time to settle and grow in areas of moisture.
Second, poorly ventilated areas tend to allow condensation build up. Hot showers, venting dryers, cooking or even washing dishes with warm water, can cause condensation build up that could facilitate mold growth.
Step #4 Buy proper Air filters
Using a few filters spread out around the house, or a house-wide air filtration system can drastically reduce the number of mold spores flying around from room to room.
Step #5 Insulate your Ducts
Any ducts that carry air that is a different temperature from the rest of the house, can cause condensation build up if they aren’t properly insulated.
Because these things usually run in corners and dark places in your home, they can often create the PERFECT conditions for mold to grow and remain undetected for long periods of time.
Step #6 Stay on the Lookout for Stray Water
Being constantly alert for signs of any leaks can go a long way to preventing mold growth. Some signs of leaking are: persistent dampness, peeling paint, strange odors and discoloration of surfaces. You can also hire a plumber to check for leak detection.
Step #7 Keep Your Fridge and Freezer in Check
Taking steps to maintain properly a properly functioning fridge can drastically decrease your chances of developing a mold problem. Fridge and freezer doors that fail to close properly and malfunctioning drop pans are potential sources of moisture for mold growth.
 Step #8 De-clutter your house
Remember, mold loves dark, moist places. Having an overly cluttered home can cast shadows that then become a perfect home for mold to move in to. Clutter also blocks proper airflow, thus allowing mold spores time to find purchase on household surfaces.
Step #9 Try plastic plants
Yes, having indoor plants can be a great thing for your home. They bring oxygen and life to an environment. However, the soil that they need to survive, is ofte- no, DEFINITELY a breeding ground for various types of mold.
So instead of taking the chance, why not pursue some near-to-life plastic plants as replacements?
Step #10 Avoid Carpet floors
Carpets are perfect places for mold spores to get lodged in. They are also moisture vacuums and can create pockets that allow for moisture build up that can’t be seen with the naked eye. Know that musty smell you get in old houses? Yeah, it’s probably mold.
Step #11 Mold resistant products
If you’re building a new home or replacing parts of an older one, using products like mold-resistant drywall and mold-inhibitors in paint may be a smart decision. Especially if you live in a moisture prone area.
Step #12 Guide water away from your home
Rain and melting snow can cause problems for you, if the ground around your home isn’t sufficiently sloped away from your foundation. Try installing ground drainage to help prevent water build up in your yards.
Step #13 Don’t Go Too Crazy (Don’t worry, it’s an easy one)
Using just a few of these steps can dramatically lower your risk of developing a mold problem. While it may be better to use all of them (if they all apply to you), it’s pretty impractical. So don’t stress too much, choose a few and get started!
Always remember, if you discover a serious mold problem in your home, contact a professional team to let them handle it for you.

It’s not always convenient or necessary to call the big guns (i.e. Us) in to handle your mold situation. This is especially true, if you haven’t had any recent major water damage or recently had a problem solved by us.
While we recommend calling in professionals to handle any major mold issues, there are a few simple steps that you-the homeowner- can take to stop mold it its tracks…or at least hold it at bay.
Here are twelve simple steps to prevent mold growth.
Table of Contents
Step #1 Never Leave Standing Water alone
This is probably very obvious to the more mold-conscious of us, however, there are some people who still allow standing water to remain for long periods of time. Mold grows very quickly; some molds can see significant growth in as little as 24 hours.
If you need proof, smell your wet laundry the next time you’ve left it out for a few hours without drying.
I know…gross, but we’ve all had rough weeks.
Back to the point. If you detect a faintly musty odor on your clothing, mold has already begun to grow in due to the moisture left behind.
Step #2 Regulate Your Humidity
This step may be arguably new to most of you since we rarely consider our humidity levels.
Humidity becomes a problem mostly during the summer and spring. The EPA recommends, maintaining humidity between 30 and 60% to prevent mold growth. Using a humidity meter, you can measure the humidity levels in your home. If they are above 55%, you may want to consider buying a dehumidifier or air conditioner to help maintain safe levels.
Step #3 Ventilate Your Homes
Mold THRIVES in homes that have poor ventilation.
This happens for two reasons. First, mold spores are transported by drafts and breezes, meaning they exist pretty much everywhere. Not having good ventilation means that mold spores brought in on the breeze, have more time to settle and grow in areas of moisture.
Second, poorly ventilated areas tend to allow condensation build up. Hot showers, venting dryers, cooking or even washing dishes with warm water, can cause condensation build up that could facilitate mold growth.
Step #4 Buy proper Air filters
Using a few filters spread out around the house, or a house-wide air filtration system can drastically reduce the number of mold spores flying around from room to room.
Step #5 Insulate your Ducts
Any ducts that carry air that is a different temperature from the rest of the house, can cause condensation build up if they aren’t properly insulated.
Because these things usually run in corners and dark places in your home, they can often create the PERFECT conditions for mold to grow and remain undetected for long periods of time.
Step #6 Stay on the Lookout for Stray Water
Being constantly alert for signs of any leaks can go a long way to preventing mold growth. Some signs of leaking are: persistent dampness, peeling paint, strange odors and discoloration of surfaces. You can also hire a plumber to check for leak detection.
Step #7 Keep Your Fridge and Freezer in Check
Taking steps to maintain properly a properly functioning fridge can drastically decrease your chances of developing a mold problem. Fridge and freezer doors that fail to close properly and malfunctioning drop pans are potential sources of moisture for mold growth.
Step #8 De-clutter your house
 Step #8 De-clutter your house
Remember, mold loves dark, moist places. Having an overly cluttered home can cast shadows that then become a perfect home for mold to move in to. Clutter also blocks proper airflow, thus allowing mold spores time to find purchase on household surfaces.
Step #9 Try plastic plants
Yes, having indoor plants can be a great thing for your home. They bring oxygen and life to an environment. However, the soil that they need to survive, is ofte- no, DEFINITELY a breeding ground for various types of mold.
So instead of taking the chance, why not pursue some near-to-life plastic plants as replacements?
Step #10 Avoid Carpet floors
Carpets are perfect places for mold spores to get lodged in. They are also moisture vacuums and can create pockets that allow for moisture build up that can’t be seen with the naked eye. Know that musty smell you get in old houses? Yeah, it’s probably mold.
Step #11 Mold resistant products
If you’re building a new home or replacing parts of an older one, using products like mold-resistant drywall and mold-inhibitors in paint may be a smart decision. Especially if you live in a moisture prone area.
Step #12 Guide water away from your home
Rain and melting snow can cause problems for you, if the ground around your home isn’t sufficiently sloped away from your foundation. Try installing ground drainage to help prevent water build up in your yards.
Step #13 Don’t Go Too Crazy (Don’t worry, it’s an easy one)
Using just a few of these steps can dramatically lower your risk of developing a mold problem. While it may be better to use all of them (if they all apply to you), it’s pretty impractical. So don’t stress too much, choose a few and get started!
Always remember, if you discover a serious mold problem in your home, contact a professional team to let them handle it for you.
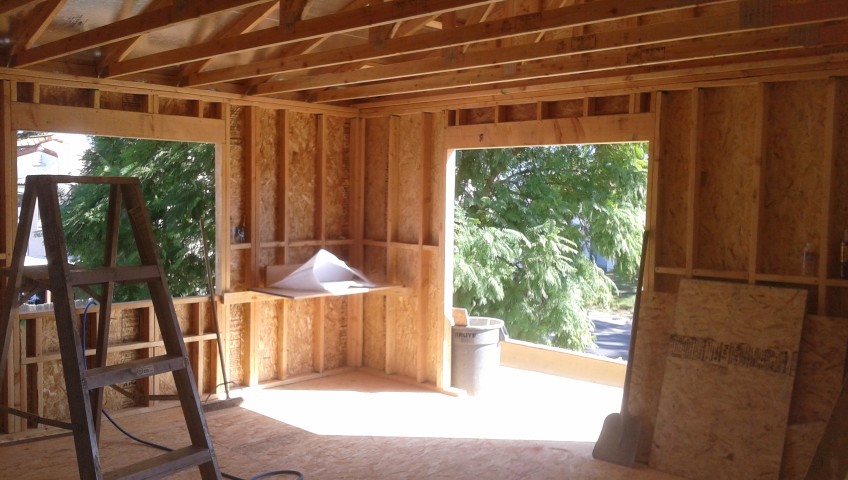
 Great, I love to sip a cup of coffee in the morning outside too. But…keep in mind you will need a different elevation for these outdoor hangouts. With rain and other outdoor elements you need to channel water and debris toward one side (with drainage) so you do not have stagnant water. Controlled water is your best friend in construction, un-controlled water this is where you have issues. So it is essential you pitch the floor to avoid moisture issues and damage to fluid that would otherwise settle. Why are two elevation differences on one floor plan difficult? Well, just think in these terms – anytime you are doing more customization and do not build homogenously things get tricky. You will have to take the framing by each phrase and stop, build and carry on. It is much easier to build one uniform elevation where you have a production line of someone cutting your joists, someone passing them and someone installing. With a deck you likely need to take your time and complete one-phase looking at specific engineering plans and having the team cool there jets to avoid building errors.
 Taking imitative is a great trait and also it is very cool to work with homeowners that have an interest in remodeling. However, it is not always advised to take too much charge on remodeling. Again, be careful what you’ve watched or seen on TV. Most general contractors have a network of subs and vendors who they’ve worked with for years after filtering through and building trust. We’ve worked with our engineer/architect for over 10 years and it’s unlike a relationship that you can get from just handing over plans after one session. Our advice is to find a contractor or if architect you hire as a team. This is much smarter and will yield a much more professional timeline and save you money. By not having to redo plans or avoiding miscommunications you are streamlining your project. Also if you hire a general contractor that works with an architect they can refer to each other in regards to the carpentry, design and code vs having a disconnect during the project. You’ll want to hire a general that has subs that get along and make the project fun and structurally correct.
 White marble is one of the most popular countertops right now. Out of every other countertop on the market, the white marble is sought after by so many. It’s been done quite well, over the years. While White marble is a favorite, there are pros and cons to using it. Below is a detailed account of the different pros and cons for the white marble countertop.
 Do you love to entertain at the holidays but feel your home lacks the right look, space or feel to accommodate a houseful of guests? There are plenty of easy remodel ideas to get your home holiday-ready for family and friends next holiday season.
 The best tip anyone can give for planning on building or renovating your home is do your research. This seems like an obvious piece of advice to give but make sure you know what you are getting into before you dive head first. Make sure you know enough about the materials you are using and the design aspects you are employing to ensure that you will get the best eco-friendly home for your budget.


 The Bathroom Retreat